This content is not yet available in English - I'm working on it.
React/Next.js + TypeScript + Emotion + Netlify の環境構築およびデプロイまでの手順です。
バージョン
- Next.js : 12.1.5
- TypeScript : 4.7.4
- ESLint : 8.21.0
- Emotion : 11.10.0
実現したいこと
- React/Next.js + TypeScript + Emotion + Netlify でwebサイトを公開する
導入手順・環境設定
Next.js のインストール
Netlify の公式サイトのスターターを使用します。
以下のリポジトリにアクセスして、Use this template ボタンからご自身のGitHubにリポジトリを作成します。リポジトリが作成できたらローカル環境にクローンします。
https://github.com/netlify-templates/next-netlify-starter
TypeScript のインストール
TypeScript をインストールします。
npm install typescript @types/node @types/react @types/react-dom --save-devtsconfig.json ファイルを作成する
touch tsconfig.jsonnpx create-next-app@latest --ts を実行した際に生成される場合と同じ内容を記述します。
{
  "compilerOptions": {
    "target": "es5",
    "lib": ["dom", "dom.iterable", "esnext"],
    "allowJs": true,
    "skipLibCheck": true,
    "strict": true,
    "forceConsistentCasingInFileNames": true,
    "noEmit": true,
    "esModuleInterop": true,
    "module": "esnext",
    "moduleResolution": "node",
    "resolveJsonModule": true,
    "isolatedModules": true,
    "jsx": "preserve",
    "incremental": true
  },
  "include": ["next-env.d.ts", "**/*.ts", "**/*.tsx"],
  "exclude": ["node_modules"]
}
next-env.d.ts ファイルを作成します。
touch next-env.d.tsnpx create-next-app@latest --ts を実行した際に生成される場合と同じ内容を記述します。
/// <reference types="next" />
/// <reference types="next/image-types/global" />

// NOTE: This file should not be edited
// see https://nextjs.org/docs/basic-features/typescript for more information.
.gitignore に追記します。
# typescript
next-env.d.ts
next.config.js ファイルを作成する。
touch next.config.jsこちらも npx create-next-app@latest --ts を実行した際に生成される場合と同じ内容を記述します。
/** @type {import("next").NextConfig} */
const nextConfig = {
  reactStrictMode: true,
  swcMinify: true,
};

module.exports = nextConfig;
ESLint のインストール
ESLint をインストールします。
npm install eslint eslint-config-next --save-dev.eslintrc.json ファイルを作成します。
touch .eslintrc.jsonこちらも npx create-next-app@latest --ts を実行した際に生成される場合と同じ内容を記述します。
{
  "extends": "next/core-web-vitals"
}
_app.js ファイルを _app.tsx に変更して、以下のように書き換えます。
import type { AppProps } from 'next/app'
import '@styles/globals.css'
export default function MyApp({ Component, pageProps }: AppProps) {
return <Component {...pageProps} />
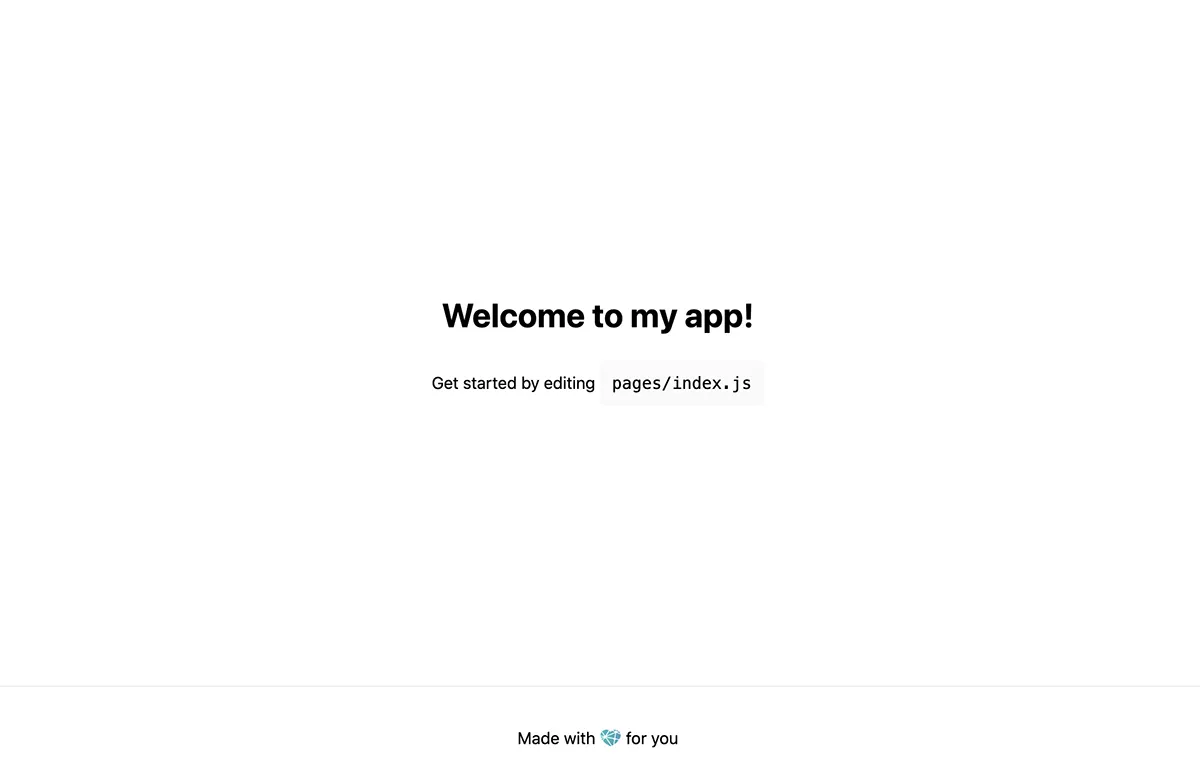
}ここで一度 npm run dev を実行して、ブラウザで http://localhost:3000 にアクセスしてみます。以下の画面が表示されれば問題ありません。
Emotion のインストール
Emotion をインストールします。Next.js で TypeScript と一緒に使用するために必要な @emotion/babel-plugin もあわせてインストールします。
npm install @emotion/react @emotion/babel-plugin --save-dev.babelrc を作成して、以下のように記述します。
{
  "presets": [
    [
      "next/babel",
      {
        "preset-react": {
          "runtime": "automatic",
          "importSource": "@emotion/react"
        }
      }
    ]
  ],
  "plugins": ["@emotion/babel-plugin"]
}
tsconfig.json に "types": ["@emotion/react/types/css-prop"] を追記します。
	"compilerOptions": {
		"types": ["@emotion/react/types/css-prop"],
index.js のファイル名を index.tsx に変更して、Emotion でスタイルを変更してみます。
import Head from "next/head";
import Header from "@components/Header";
import Footer from "@components/Footer";
import { css } from "@emotion/react";
export default function Home() {
return (
<div className="container">
<Head>
<title>Next.js Starter!</title>
<link rel="icon" href="/favicon.ico" />
</Head>
<main>
<Header title="Welcome to my app!" />
<p css={desc}>
Get started by editing <code>pages/index.js</code>
</p>
</main>
<Footer />
</div>
);
}
const desc = css`
color: green;
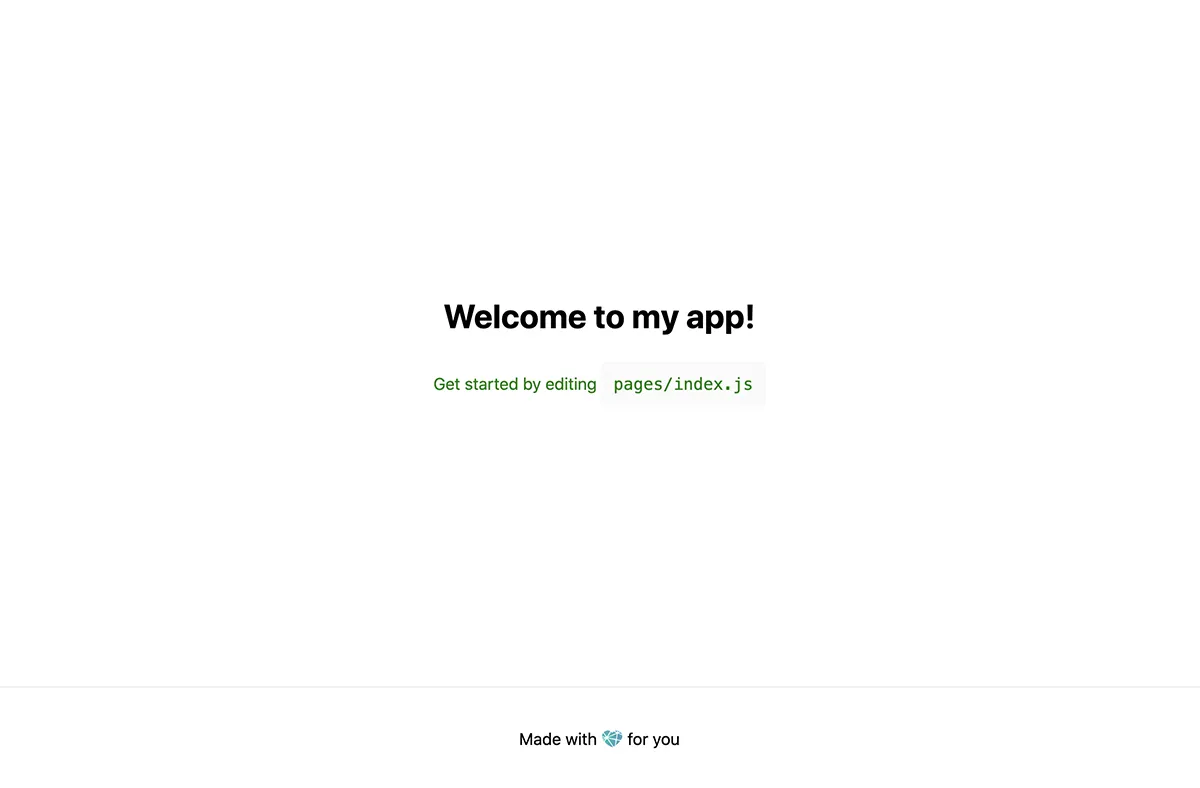
`;もう一度 npm run dev を実行して、ブラウザで http://localhost:3000 にアクセスします。以下のように、テキストがcssで指定した色に変更されていれば問題ありません。
ファイルを src フォルダにまとめる場合
src フォルダを作成して、 components pages styles フォルダを移動します。
tsconfig.json に baseUrl と paths を追記します。
{
  "compilerOptions": {
    // 省略
    "baseUrl": ".",
    "paths": {
      "@*": ["./src/*"]
    }
  }
  // 省略
}
Netlify にデプロイする
インストール・環境設定が完了したら、GitHubのリポジトリに作業内容をpushします。
Netlify にログインして、 「Add new site」 > 「Import exising project」を選択します。
「Connect to Git provider」でGitHubを選択します。
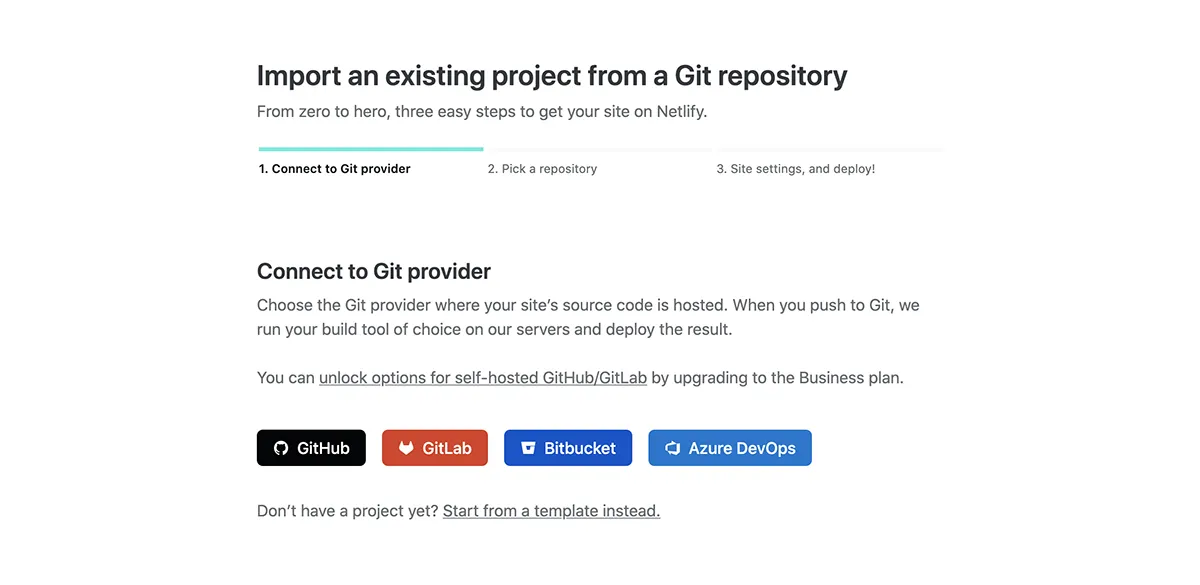
「Pick a repository from GitHub」に切り替わり、リポジトリの一覧が表示されるので、先ほどpushしたリポジトリを選択します。
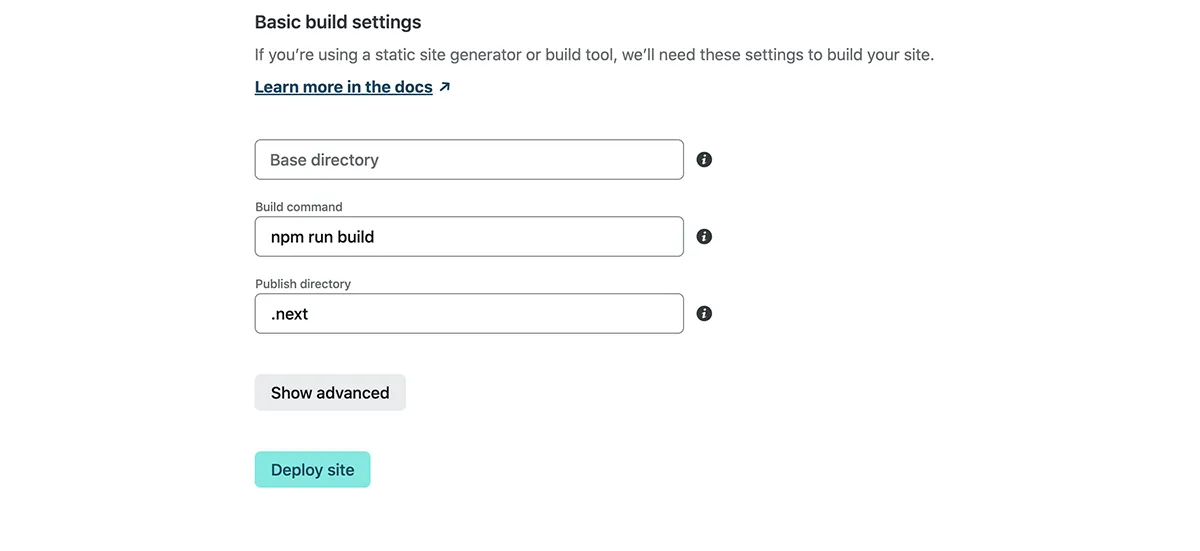
「Basic build settings」はデフォルトのままで問題ありません。確認できたら「Deploy site」をクリックしてデプロイします。
デプロイが完了してステータスが「Publihed」になったら、Netlifyで自動生成されたURLにアクセスします。以下の画面が表示されれば完了です。

デモ
https://nextjs-typescript-netlify-starter.netlify.app/
参照
- Basic Features: TypeScript | Next.js https://nextjs.org/docs/basic-features/typescript(2022-8-13参照)
- Reactでの開発力UPのため色々試してみたまとめ https://zenn.dev/panyoriokome/scraps/3cf82075af96ed(2022-8-14参照)
- next.js/examples/with-emotion at canary · vercel/next.js · GitHub https://github.com/vercel/next.js/tree/canary/examples/with-emotion(2022-8-14参照)